New-home roof installation in Florida starts with approved plans, continues through framing and protective roof layers, and finishes with required inspections. The completed system combines structural connections, decking, underlayment, flashing, and the roof covering to manage rain and wind.
We recommend following construction milestones, rather than judging progress by whether shingles or metal panels are visible. Important work happens underneath those finished materials.
For a new home, roofing also affects when interior work can move forward. Understanding the sequence helps you follow the build and recognize what each completed stage means.
Key Takeaways
- New construction starts with roof framing and decking, without the removal work involved in replacing an existing roof.
- Underlayment, flashing, and roof coverings work together, while structural connections transfer wind forces through the home.
- Required building inspections and an independent buyer inspection have different purposes.
- Weather, material deliveries, and inspection availability affect the schedule. A finished-looking roof doesn’t mean the home is ready for occupancy.
Plans and Permits Set the Roof Requirements
The Design Starts With the Property
Roof installation begins before materials reach the jobsite. Construction documents establish the roof shape, structural system, covering, and connection details.
Florida wind design depends on the property’s location and exposure, along with the building’s height and geometry. Therefore, a specification that works for one property doesn’t automatically suit another.
We recommend treating the roof as part of the whole home. Roof-to-wall connections must work with the walls and foundation to provide a continuous load path. Strong walls alone cannot replace properly connected roof framing.
Code and Product Approvals Guide Installation
The Florida Building Commission lists December 31, 2023, as the effective date of the Florida Building Code, 8th Edition (2023). The applicable code and approved permit documents guide the project.
Roofing materials also need to suit their approved application. A product’s attachment method and installation instructions matter alongside its appearance.
For engineered trusses, the residential code requires approved truss design drawings before installation. These drawings establish how the structural components fit together and carry loads.
Framing and Decking Create the Roof Structure
Trusses Establish the Shape and Support
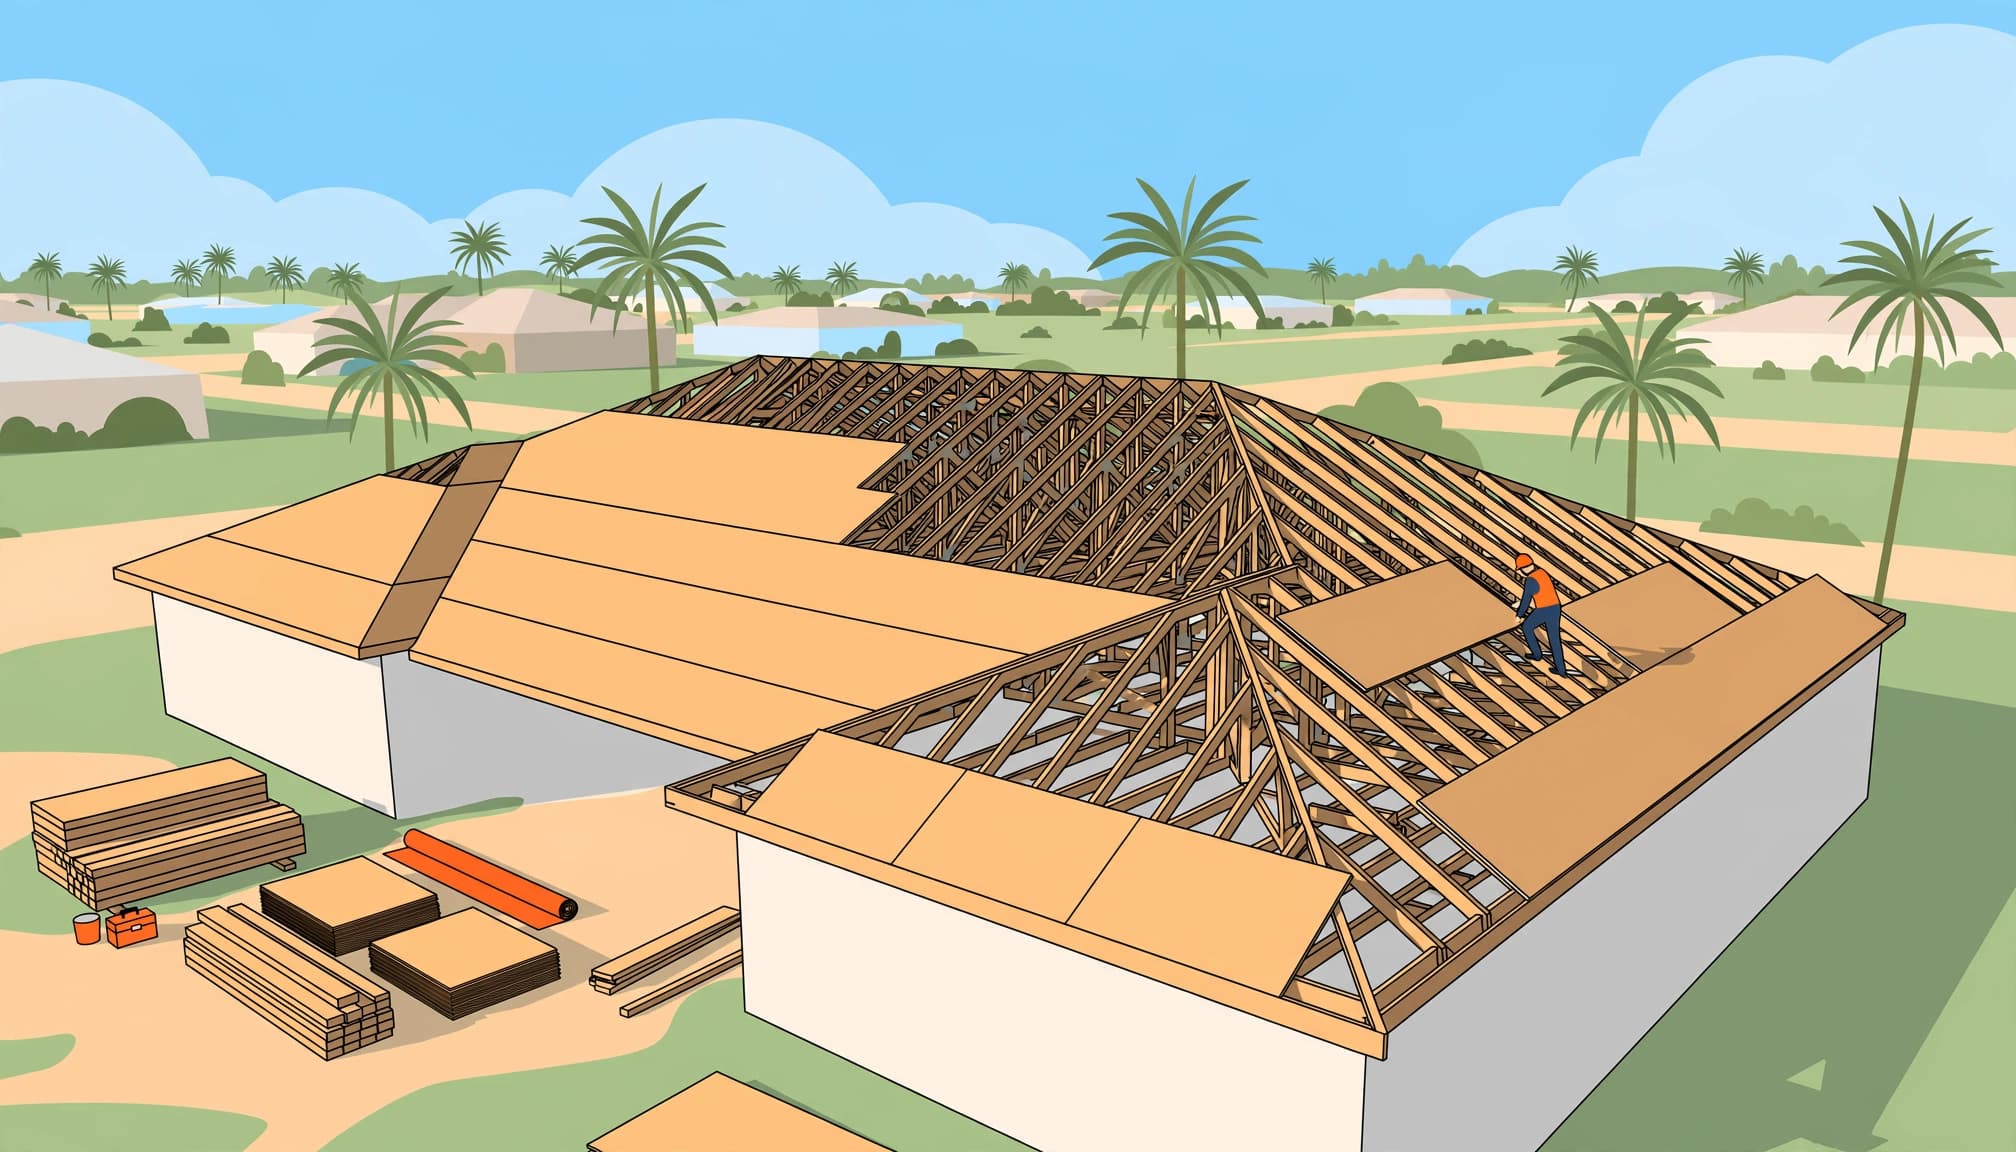
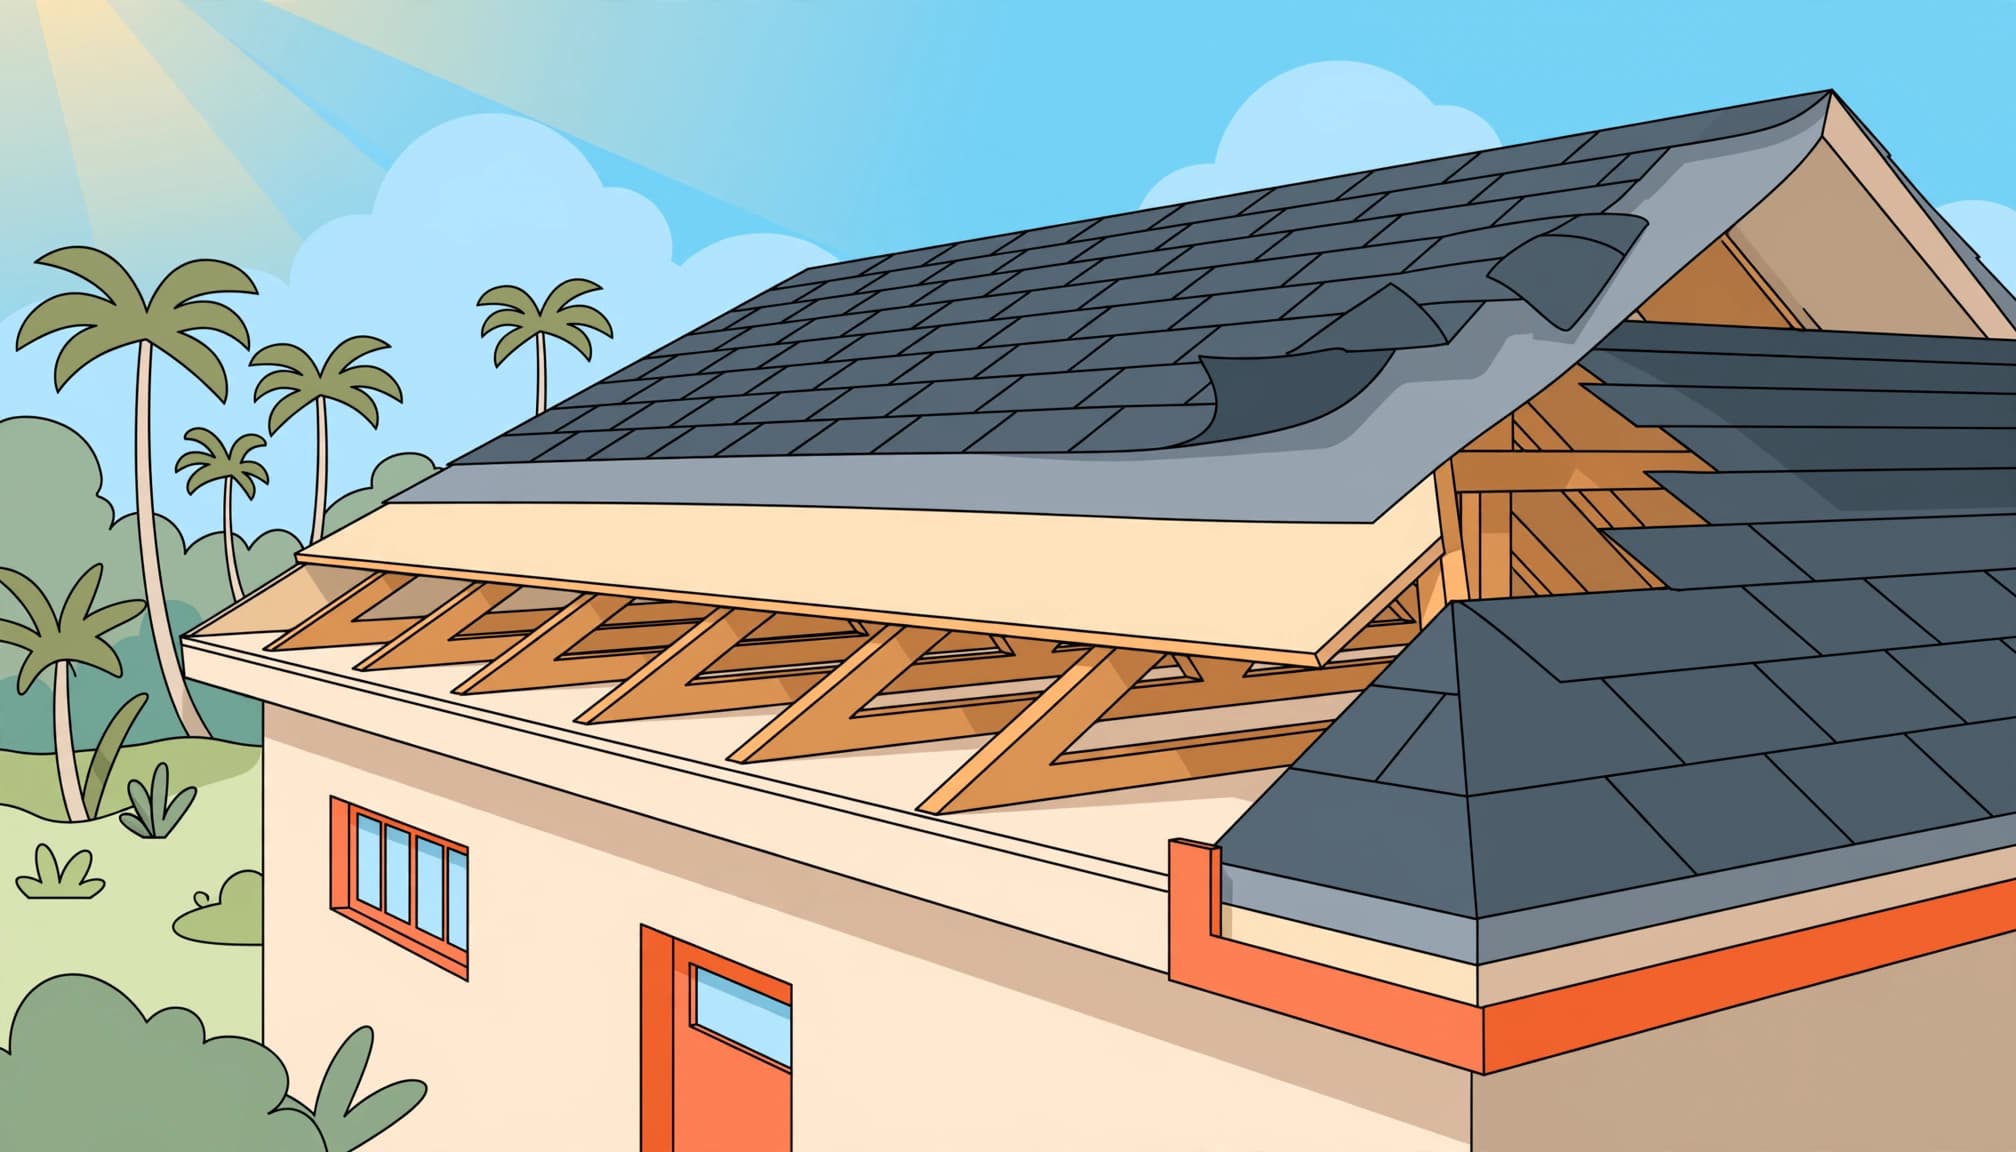
Once the supporting walls are ready, crews install roof trusses or other designed framing. Trusses establish the roof’s shape and support the materials above.
Bracing stabilizes the framing, while connectors attach it to the supporting structure. These connections deserve attention before later construction conceals them.
We recommend documenting visible structural work during construction. Photographs can help explain roof-to-wall connections during future insurance reviews or repairs. However, photographs don’t replace the required inspections or engineering documents.
Decking Provides the Installation Surface
Next, crews attach roof sheathing, often called decking, over the framing. This creates the surface that supports the underlayment and roof covering.
Panel condition, attachment, and alignment matter because the layers above depend on this base. The approved design controls the installation details.
Required inspections evaluate applicable work before it becomes concealed. If an inspector identifies a correction, the crew addresses it before the affected work moves forward.
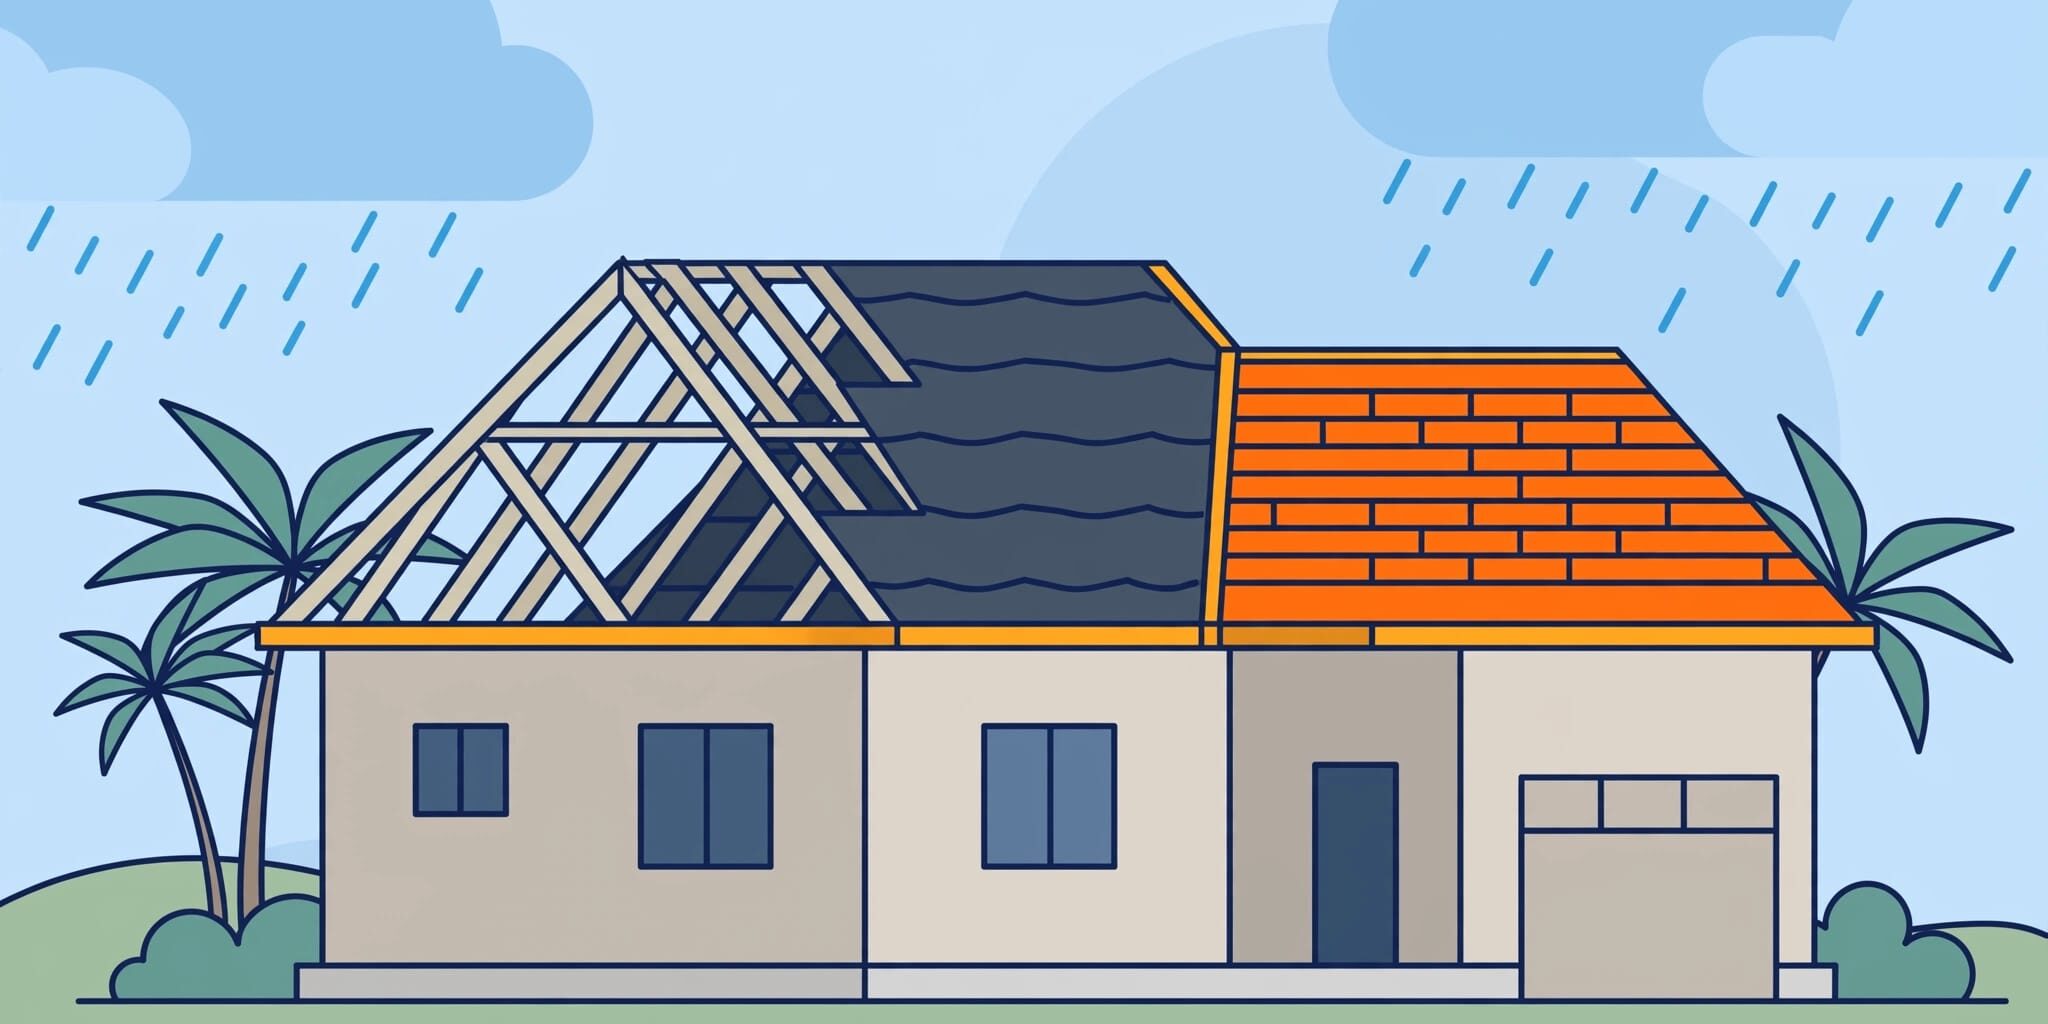
At this point, the house may look substantially more complete. However, exposed decking isn’t a finished weather barrier, and the next stage still needs careful scheduling.
Underlayment and Flashing Protect Against Water
Dry-In Adds a Protective Layer
After the decking is ready for the next stage, crews install the specified underlayment system. Builders often call this part of the process dry-in.
Underlayment adds protection beneath the finished roof covering. Its installation includes details around seams, roof edges, and openings, according to the approved assembly.
Florida’s residential roof assembly requirements address roof coverings and their installation. The correct assembly depends on the selected material and project requirements.
Dry-in is an important milestone, but it doesn’t mean every opening in the home is weather-tight. Windows, exterior doors, wall penetrations, and other unfinished areas still affect moisture protection.
Flashing Handles Vulnerable Locations
Flashing directs water away from joints and openings. Crews install it where the roof meets walls and around penetrations such as plumbing vents.
Valleys need attention because intersecting roof slopes concentrate runoff. Roof edges also require coordinated underlayment and drip-edge details.
We place importance on these transitions because heavy Florida rain quickly exposes drainage weaknesses. A broad roof surface can look neat while an unfinished penetration still allows water inside.
The Roof Covering Completes the Exterior System
Once the underlying work reaches the appropriate approval stage, crews install the selected roof covering. Asphalt shingles, metal, and tile each require different attachment methods and detailing.
The comparison below explains how material selection affects installation.
| Roof Covering | Installation Focus | Planning Consideration |
|---|---|---|
| Asphalt shingles | Starter courses, shingle fastening, flashing, and ridge details | The selected shingle system controls installation requirements. |
| Metal | Panel layout, seams, fasteners, and penetrations | Exposed-fastener and concealed-fastener systems need different details. |
| Tile | Tile layout, attachment, underlayment, and flashing | Structural design must account for the selected assembly’s weight. |
The practical takeaway is that changing materials can affect more than appearance. Structural requirements, accessories, labor, and inspection needs can change too.
We recommend settling the roof selection before ordering and installation. Late substitutions can require revised documents or additional coordination.
During installation, crews complete hips, ridges, valleys, vents, and penetrations as the assembly requires. Ridge ventilation applies where the attic design calls for it. Some homes use different attic systems, so visible ridge vents aren’t universal.
Finally, the finished covering must work with the layers beneath it. An attractive surface doesn’t reveal every fastening or flashing detail.
Florida Weather Shapes the Installation Schedule
The Atlantic hurricane season runs from June 1 through November 30. During that period, heavy rain and high winds can interrupt roofing and other exterior work.
However, weather affects more than the hours crews spend on the roof. Storm preparation can interrupt deliveries, while recovery work can reduce subcontractor and inspection availability.
We recommend a written construction schedule that identifies roofing milestones and allows for normal interruptions. A useful progress update distinguishes framing, decking, dry-in, covering installation, and inspection approval.
Materials also affect timing. The roof covering, compatible accessories, and flashing components need to arrive in the right sequence.
Interior work depends on appropriate protection against rain. Therefore, a delay in closing the exterior can affect insulation, drywall, and finishes. Moving those trades forward before the building is ready can create moisture problems and additional repair work.
Inspections Review Different Parts of the Work
Required Inspections Follow the Permit
Local building inspections assess compliance with applicable codes and approved plans. The permit and construction method determine the required inspection stages.
For example, St. Lucie County’s new-construction roofing process lists decking or sheathing, dry-in, and final inspections. That is a local example rather than a schedule for every Florida home.
Some roofing systems also need inspection while attachment details remain visible. Concealed fasteners and adhesive attachment can require different review points than exposed components.
Inspection approval allows the applicable work to advance. However, a roof approval doesn’t mean every construction task or buyer concern is complete.
Buyer Inspections Review the Home’s Condition
An independent buyer inspection has a different purpose. It can identify workmanship concerns, visible damage, moisture evidence, and unfinished details beyond the permit review.
We recommend arranging phase-inspection access in the construction agreement. An inspection before insulation or drywall can review visible trusses, connectors, and other structural components.
A final review can address accessible roof areas, flashing, vents, soffits, fascia, and signs of leakage. Roof access involves fall hazards, so qualified professionals should handle elevated inspection work.
Once finishes conceal a connection, a final walkthrough cannot provide the same view available during construction.
Written reports and dated photographs give the builder clear locations for corrections.
Roof Records Support Ownership and Maintenance
Before closing, we recommend collecting the roof’s product information, inspection approvals, construction photographs, and warranty documents. Keep these with the home’s plans and signed changes.
Manufacturer warranties and builder warranties cover different matters. The written terms explain coverage, exclusions, maintenance duties, and repair-notice procedures.
Wind-mitigation documentation also has a separate purpose. Roof shape, deck attachment, roof-to-wall connections, and opening protection can affect insurance consideration. A wind-mitigation inspection doesn’t replace a building inspection or buyer-focused home inspection.
For investors, organized records also support property management and future repairs. Renters should report leaks or ceiling stains promptly to the owner or manager.
After move-in, report suspected leaks in writing with photographs and the location. Prompt reporting helps limit water damage and creates a dated record for the applicable warranty process.
Frequently Asked Questions
Can Interior Work Start Before the Roof Is Finished?
Some construction activities can overlap, but moisture-sensitive materials need suitable protection. Dry-in is an important step, yet unfinished windows, doors, and penetrations can still admit rain.
The construction sequence should protect insulation, drywall, cabinetry, and flooring against weather exposure. We recommend following the home’s actual enclosure condition rather than assuming a visible roof covering means every interior area is ready.
Does a Finished Roof Mean the Home Is Ready for Move-In?
No. The home still needs its remaining construction work, required approvals, and applicable certificate of occupancy before occupancy.
A roof inspection addresses its permitted scope. It doesn’t replace the home’s broader completion process or your final walkthrough. Written punch-list items help separate unfinished work from completed items and keep corrections clear before closing.
A Strong Roof Depends on Every Stage
A new roof installation in Florida brings together structural support, water protection, and the finished covering. We recommend following those milestones and keeping the records that document them.
Hidden connections and protective layers deserve as much attention as the roof’s appearance. Approved plans, careful installation, and timely inspections support a dependable finished home.
When you’re ready to plan a build in Lee, Charlotte, or Highlands County, discuss your home construction plans with our team.